HOMEABOUT MERESUMETUTORIALSMY FAVES

Friday, September 2, 2011

Mini Owl 'Love' Album


Good evening once again fellow scrappers! Today I bring you my first shaped mini album. I'm very happy how it came out! This tiny album measures about 3" inches in height. So when I say it's tiny--I mean it's tiny! :-) I used the Mini Owl Album by Clear Scraps.

I have to admit that I was very much inspired by Irene Tan (Scrapperlicious) when making this album. I took many of her tips & techniques to make this small little treasure. It's funny how something this small can utilize so many different techniques. I'll be highlighting a few of these techniques in this post.

This was also a DT project that I made for Stamp Enjoy.

I made the black & red beaded flower seen on the cover. I have these beaded flowers in a variety of colors available in my small Etsy shop. So if you like them--feel free to stop by.

First technique tip is the black flourish seen on the cover. I used Tim Holtz's Elegant Flourishes die with grunge board. I cut the flourishes in several pieces to use throughout the album.

TIP: To get that 'shimmery' look on chipboard or grunge board I first painted the flourish with black acrylic paint. I then heat embosssed it with Star Dust embossing power by Stampendous. In person this gives of a very shiny look!


The 'Love' stamp is by Stamp Enjoy. All the edges of the album's pages were inked with Tea Dye distress ink. I also randomly applied Silver Stickles along the edges of the pages to further dress them up.

Rub ons were also widely used throughout this mini album as well as flat flowers in order to avoid making the album too bulky.


The album is primarily about family & the love that is shared amongst family. I went online & found several quotes that went along nicely with the theme of my album. I then printed them onto cream colored cardstock, distressed the edges & inked them.

TIP: In this photo you'll notice that the page is see-through. This entire album is clear acrylic. I covered most of the pages with paper but I left a couple of them without paper. Instead I covered these pages with alcohol inks & ran them through my Big Shot in order to dry emboss them. This techniques gives off a completely different look.


Ribbon was randomly applied throughout the pages of the mini album. I punched holes through the acrylic with my Crop-a-Dile & then tied pieces of ribbon through these holes.

The floral stamp seen here is by Stamp Enjoy titled Balisier. TIP: If you don't have enough room for a specific stamp or if you want to place the stamp in a difficult spot try stamping the image on a transparency or acrylic & cut it out. This way you can place the image any where you wish. Just make sure you use glue that dries clear when adhering the transparency. Also to further dress up your images--add a bit of clear Stickles such as Crystal or Star Dust as shown in this screen shot.

Thanks to all of you who stop by. I truly appreciate your visit. I hope to have the time to make more mini albums. These make such wonderful keepsakes that can be passed down to many future generations.

Photobucket

Wednesday, August 24, 2011

Priceless Layout


Today's page is one based on my wedding. This is one of my favorite pictures from that special day. The angle the picture was taken was just right in my opinion--it's just one of those photos that always makes me smile.


This is a layout I've done for Stamp Enjoy. I primarily used papers from Kaisercraft's Chapter One collection. I did some stitching, stamping, misting, lacing & distressing on this page. I used Martha Stewart's Wildflowers punch for the border in the upper part of my page.


A closeup of the chipboard border I used for the lacing. This chippie is by Dusty Attic. I first painted the chippie with black acrylic paint. Once dry I inked it with embossing powder & heat embossed it with Kaleidoscope Transparent embossing powder by Stampendous. I found this particular embossing powder at my local Michaels. I absolutely love the effect this particular embossing powder gives as shown in this photo! In person, it adds a wonderful touch to the page.


A closeup of the double lacing. I have a brief tutorial on this lacing found in my blog. If interested, you can find the tutorial for this double lacing here.


A closeup of the stamping. This stamp is by Stamp Enjoy & is called Balisier. I stamped it by using three different shades of inks. The black was primarily to give the flower a 'shadow' effect.


A closeup of the flowers & stick pin. I made the stick pin myself. It was my very first stick pin & I'm really happy how it came out!


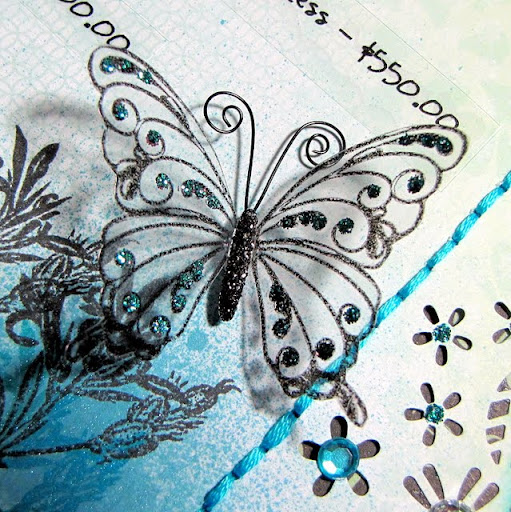
This is a closeup of the clear butterfly. I currently have this butterfly available in my Etsy shop. If interested, please feel free to visit my small shop. You can also see a bit of my hand stitching in this closeup.


Finally, a closeup of the other Dusty Attic corner chippie I used & of the acrylic flower. The Dusty Attic chippie was first painted with white acrylic paint & then heat embossed with Star Dust embossing powder by Stampendous--also found in my local Michaels.

The acrylic flower I found in an Etsy shop called FrogFeathers.

You can also see that I further decorated the floral design of the punch by adding rhinestones & Stickles in the center of the flowers.

Thanks to all of you who stop by--I very much appreciate the visit!


Photobucket

Double Lacing Tutorial


Hello once again fellow scrappers! Today I'll be showing how I went about doing the double lacing seen in my 'Priceless' page. I call it 'double lacing' because it uses two ribbon strands instead of just one.


Besides ribbon, you can also use twine or even tulle to give it a softer look. I got the lacing bug from my scrap buddy Natasha who religiously uses it on her pages. I've taken her love of lacing & have added my own small twists to it--this is one of them.
Both strands can be the same color or different. I find that having strands in different colors looks better--but the choice is yours. You can also mix & match what you use for the lacing such as one strand of ribbon & one strand of twine.
Let's get started...

Wednesday, July 13, 2011

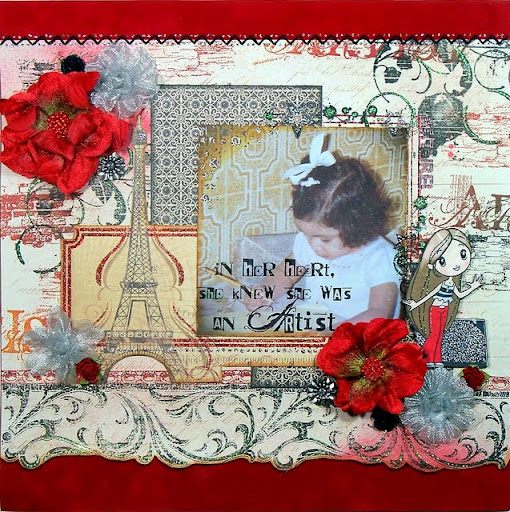
Artist Layout


Good evening once again fellow scrappers & bloggers! Today's post is one based on yours truly. That's me at a very young age doing what I've always loved to do...draw! Gotta love the big ol' bow in my hair & the so very 70's wall paper! :-)

As usual, I did an overload of stamping on this page. The entire background is stamped including the large flourish scroll border you see at the bottom. This is a DT page for Stamp Enjoy. I've also used stamps by Tattered Angels & Stampers Anonymous. Some stitching, misting & Stickles to accentuate my stamped images added the final touches to the background.

The 'artist' sentiment that I stamped directly onto my photo is by Stampers Anonymous. Ensure that any stamping done directly on photos is with permanent inks such as StazOn or else your stamped image will smear.

The red velvet flowers were by Petaloo & the silver ones by Prima. Here you can see a close up of the stamped flourish border & how I dressed up the flourishes with a bit of Diamond Stickles. The flourish stamp is from a set called Architectural Trims by Tattered Angels.

This next screen shot shows a bit of the zig-zag stitching I did & a texture stamp by Stamp Enjoy titled Volutes et Ronds. I have to say that I'm in love with this stamp. I've used it in just about all my backgrounds because it adds just the right amount of grungy texture.

Tip: Dress up your stitching with a bit of Stickles. I added two drops of Silver Stickles in between each zig-zag stitch to give the stitching a different look.

Here's a close up of some heavy hole punch distressing that I did to the corner of my photo. Just take hole punches of different sizes & randomly punch away at a corner--then ink it up with some distress inks. I used Tea Dye distress ink on my photo. This technique I got from Irene Tan better known as Scrapperlicious.

This very cute little 'artist' stamp is by Stamp Enjoy titled Abreen Artiste. I colored her with Prismacolor markers & dressed her up with Stickles. I used a bit of light pink chalk to add the pink glow on her cheeks.

This final screen shot shows again the Volutes et Ronds stamp as well as the corner angle stamp by Stamp Enjoy titled Naturel. Once again, you can see in this screen shot how I used the Stickles to dress up my stamped images.

Thanks to all of you who take the time to stop by. I hope this page inspires some of you to create your own backgrounds with stamps!

Photobucket


Thursday, June 23, 2011

Precious Memories Layout


Good evening once again fellow scrappers & bloggers. Today's page is one I made for Stamp Enjoy as well as for a good friend & co-worker of mine. My friend has two little girls & I've already had the pleasure of scrapping one of them. Check out this little cutie here. I couldn't forget his other little girl in addition to the fact that her dad told me that she got a little pouty because there was no page for her. So here it is! Am hoping she likes it as much as her sister liked her page. :-)

As usual, I couldn't leave my stamps aside for this one even though the paper I used for my background came fairly decorated already. I further added to the background by adding some stamping, misting & Stickles.


A closeup of the misting & stamping. This clear butterfly is a stamp by Stamp Enjoy titled Butterfly in the Grass. I stamped it with StazOn black ink onto a piece of acrylic, cut it out & then colored in the wings with purple & Diamond Stickles. Tip: if you're planning on doing this technique, remember to add the glitter on the opposite side of where you stamped. When the glitter dries flip the image back around, adhere & you're done! I also added black Stickles to the body of the butterfly.

The heart seen here is also a stamp by Stamp Enjoy titled Heart Foliage.

The red cardstock seen behind the photo was dry embossed. I then sanded down the embossed image.

This rose stamp is a newly released stamp by Stamp Enjoy titled Roses. Just like the butterfly stamp--I stamped the rose onto acrylic paper with StazOn black ink, cut it out & decorated it with some Diamond Stickles.

The white border you see going around the picture is actually white acrylic paint that I tapped on with a stipple brush.

A closeup of the other rose stamp found towards the bottom of the page & more misting. By the way, I used Scarlet glimmer mist on this page.

Finally, a closeup of my second butterfly & the fence. The fence is made out of wood. I painted it with crimson red acrylic paint. Once it dried I spread Black Diamond Stickles all over it with my finger in order to give it a 'stone' type texture.

Other stamps used on this page are by Stampers Anonymous & Tattered Angels.

Thanks to all of you who take the time to stop by my blog...I appreciate it!

Photobucket


Wednesday, May 25, 2011

Reflection Layout


Good evening fellow scrappers! I was due for a Toby page & here he is! Admiring himself in the mirror. He does this a lot. Call him vain but he's always checking himself out. I was lucky enough to finally capture him doing this in a perfect angle.

This is a DT page for Stamp Enjoy. It showcases just a few of thier fabulous stamps which I think are excellent for making your own personalized backgrounds.

The majority of the chipboard is by Dusty Attic (except for the glitzy owl). In addition to the stamping; the background was spritzed with Olive Smooch & the edges inked with Burnt Sienna chalk ink.

I've used the Creative Scrappers sketch # 157 shown here. I just flipped the design...

Here's a closeup of the Dusty Attic brick chipboard. I used the Brick Texture technique on these chippies to give it that rustic look. You can find a brief tutorial on how to achieve this 'brick' look here.

A closeup of additional Dusty Attic chippies. For these, I painted them in white acrylic paint & then heat embossed them with Star Dust clear embossing powder. In real life, these chippies give off a beautiful glimmer!

I added a row of gold eyelets as a border. Am so grateful to my scrap buddy Natasha for making me realize the possibilities of eyelets! Till she came along, I thought they were only good for keeping the laces on my sneaks on tight...who would've thought eyelets could be used for so many other things!

I used Tim Holtz's Scrollwork die for the swirly border.

Here's my owl! This little guy is actually made out of wood. These wooden embellishments are from Scrap Desirs. They're thicker than regular chipboard & add fabulous dimension to your projects. I actually colored the branch with a permanent brown marker & then added clear iridescent glitter. I applied Martha Stewart brown leaf glitter to the owl itself. I used little yellow rhinestones for the owls' eyes & beak.

More Dusty Attic chipboard. This screen shot also shows one of Stamp Enjoy's stamps titled Border Corner 2. Quick Tip: to add more dimension to your stamping, accentuate the design with Stickles or glitter as shown here.

Here's another stamp by Stamp Enjoy. This one is titled Volutes et Ronds. As you can see I accentuated the stamps design by adding Stickles to it.

One more closeup of yet another Stamp Enjoy stamp. This one is called Lantern 1.

Before I wrap this post up--here are the Stamp Enjoy stamps I've used on my page.

Thanks to all of you who stop by. I appreciate you taking the time!

Photobucket


Monday, May 16, 2011

Be Unique Layout & Announcement


Good evening fellow scrappers & bloggers! I had momentarily lost my scrapping mojo for a bit there--but I blame work. Things have calmed down just enough for me to magically regain my mojo & it has come back with a vengeance!

Today's page is titled 'Be Unique'. This cute little brown eyed girl is actually the daughter of a good friend of mine. Gotta love those chubby cheeks & that fabulous smile!

The message I was giving this little one was to be yourself no matter what--to be a leader not a follower. That's the message I was trying to convey with the butterflies. Notice how all of them are the same except for one & it's the prettiest one out of them all. :-)

I did a lot of inking, misting & stamping on this one. I used a combination of Worn Lipstick & Shabby Shutters distress inks for the background along with Graphite glimmer mist. Pretty much all the stamps you see here are by Stamp Enjoy. Thier stamps are absolutely perfect for creating your own backgrounds.


Here's a closeup of one of Stamp Enjoy's texture stamps called Volutes et Ronds. In this shot you also see a bit of masking & a couple of the butterflies.

Here's a closeup of the lacing. After playing around with 2 strands of different colored ribbon for about 1 hour--I came up with this combination of lacing styles. I hope to soon post a tutorial on this lacing--if I can remember how I went about it! Mind you I was doing this lacing at about 1:30 in the morning...

The very pretty stick pin I bought from Mandy's (Craftysprinkles) Etsy store.

Here's a closeup of the transparent butterfly. The butterfly is an image that was printed on a transparency. I then added a bit of Stickles to the wings & glittered the body. I have a couple of diverse transparent or 'glass' butterflies in my small Etsy shop. These butterflies add a nice & unique touch to pages because of thier clear nature.

A close up of the large flower cluster & the journaling. I tucked a bit of baby's breath (a.k.a gyp) behind the large flower. Baby's breath adds such a delicate touch to girl themed pages.

Finally a closeup of another stamp by Stamp Enjoy. This one is called Cage 1.


Speaking of Stamp Enjoy--I have some fabulous news to share. I've been asked to be part of their DT & I'm so very happy to have accepted! I've used their stamps to create my own backgrounds for several of my pages & I love how you can create your own mini 'works of art' by combining thier stamps with inks & mists. I'm looking forward to utilizing thier stamps for many more creations.

Thanks to all of you who stop by & visit--I very much appreciate you taking the time.

Photobucket

Tuesday, April 26, 2011

It's No Fairy Tale Layout


Buenas tardes fellow scrappers! Today's page is a trip down memory lane for yours truly. Yep, that's me in the stroller some many moons ago. This page is actually a letter for my future child(ren). They say scrapbooking can be used to send letters to those that have passed & to those that are yet to come. So with this picture I've taken the opportunity to send a message to my 'to-be-child(ren)' regarding a very important lesson that I've already come to learn. Journaling reads as follows:

I know you don't currently exist & I'm not sure just when you'll arrive. What I do know is that I already have a message or you that I hope to pass onto you when the time comes. You'll refer to this piece of advice quite often in your journey called life.

Unfortunately, life is not a fairy tale. I've discovered that life is more like a storm--you'll find yourself basking in the sun one moment & then be shattered on the rocks the next--but it's what you do in those moments that you're shattered that defines you & makes you stronger. You'll have your ups & your downs--your laughs & your sorrows--& your own mistakes will be your best lessons. Yes, life is no fairy tale--but every second of every minute of every day is so very much worth living.

So I got a bit philosophical or maybe Shakespearean--but I base my advice on my own experience! Before I go on any further--just some tid bits on the supplies used on this page.


Once again I used a sketch from Creative Scrappers to design this page. All papers are from the Bittersweet collection by Basic Grey. I've had these papers just about forever & finally found the right page to use them on.

As usual I stamped the entire background--this seems to have become my 'must' technique on my pages lately. I used a combination of stamps. Here is a closeup of some stamping. The clock & circular texture designs in pink are stamps by Stamp Enjoy. The small script stamp is by Prima.

Other stamps used on this page are by Stampers Anonymous.

On this closeup you can also see the hand stitching I did along the borders of the page.


A closeup of the chipboard flourish. This chippie is by Maxine's Melange. To get the texture you see here, I first painted the chipboard in black acrylic paint. Then I heat embossed it with clear Star Dust embossing powder. In person, this flourish is very 'blingy'!

I added the title along some of the scrolls of the chippie.

A closeup of the flowers. The large dark pink flower is by Prima. The two smaller flowers were handmade by me. I refer them as 'frosted flowers' because the glaze on the vellum give them a frosty look. They were made with hand punches, vellum, inking & some glaze. To see a brief tutorial on how these flowers were made, please go here.

I tucked small white twigs of baby's breath (also known as gyp) underneath the flowers.


Finally a closeup of the lacing. This fabulous lacing technique is by my scrap buddy Natasha. I've been wanting to use her 'twisted lace' technique for a while now & this page gave me the perfect opportunity to do so. If interested in learning this lacing technique, please go to Natasha's post here. She did a great tutorial on this lacing technique. Thank you girl!

Thanks to all of you who stop by--I appreciate your visit so very much! Hope you didn't mind taking this brief trip down memory lane with me.
Photobucket

Frosted Flower Tutorial


Hello again fellow scrappers! This brief tutorial is on how to make the frosted flowers seen on my 'It's No Fairy Tale' page. The flower itself has most likely been done by several scrappers--I simply added a bit of glaze to the vellum. The glaze gives the vellum a 'frosty' look which is how these flowers got thier name.

Here's your basic list of supplies: flower punch, vellum, decorative scissors (optional), ink, paint brush, skewer or pencil for curling the petals, Triple Thick Glaze & glue.

Let's get started...