HOMEABOUT MERESUMETUTORIALSMY FAVES

Thursday, January 26, 2017

'Beloved' & 'Eastertime' Pop Up (Twist and Fold) Mini Albums With Tutorial

Hello again fellow scrappers!  Today's project is one that is my fave by far.  While browsing through YouTube, Pinterest & other online sites I noticed several tutorials & images for the 'Pop Up' cards--I've also seen them called 'Pop & Twist' cards.  However, I'm not a card maker, so even though I thought the idea was original & unique--I didn't give it much thought.

Then I came across a fabulous tutorial by a fellow crafter named Alagaina.  Alagaina lives in Spain & has a YouTube channel full of fabulous tutorials, project shares & ideas.  She was clever enough to take the 'Pop Up' card technique & use it to create a mini album.  At this point I was hooked & had to try it!


I absolutely LOVED it!  It's such a creative twist to the 'Pop Up' card technique & you end up with a unique keepsake for yourself or for someone else.  I believe that these mini albums make for fabulous gifts as well.

So for my first 'Pop Up' mini album, I used one of Authentique's latest Valentine themed paper collections called 'Beloved'.
The mini measures 4" x 6" inches when closed & it has three different pop up panels.  For both of my minis I've used an elastic ribbon as a 'belly band' for the closure.

How you decorate the inside is really up to you.  You can make pockets, belly bands, adhere envelopes, add a flip page etc...or just simply leave them blank.


Here's a second 'Pop Up' mini album made with Authentique's 'Eastertime' collection. 


Supplies: Paper - Authentique, Flowers - I Am Roses, Prima, Petaloo, Other - Mini Flocked Bunny, Shimmery Elastic Ribbon, Washi Tape

Both of these mini albums are currently available for sale in my Etsy shop 'The Kraft Nook'.  If interested, feel free to stop by my shop here.

As previously mentioned, I followed Alagaina's tutorial which is in Spanish to make these mini albums.  When my mini album was shared on Authentique's social media, it caught the eye of many people & the requests for a tutorial started flooding in.

Even though Alagaina does provide her measurements in both inches & centimeters, we still had many requests to have the tutorial in English.  So I reached out to Alagaina & asked for her permission to translate her tutorial into English.  She graciously gave me permission to do so.

Below you'll find the link to my translation of Alagaina's 'Pop Up Mini Album' tutorial.  In the description box below my tutorial in YouTube, you can also find links to Alagaina's YouTube channel & to her original 'Pop Up Mini Album' tutorial.

Enjoy!


Friday, January 20, 2017

'Explore' One Sheet Mini Album


Today's project is a mini album that was created from just one sheet of 12"x12" inch card stock.  You gotta love these little mini wonders that can easily be put together in just an hour or two!  I've used papers from Authentique's 'Explore' collection to create this mini.   

This was a DT project for Authentique & is available for sale in my Etsy shop 'The Kraft Nook'.  If interested, please feel free to visit my shop hereUPDATE: Mini album has been sold.

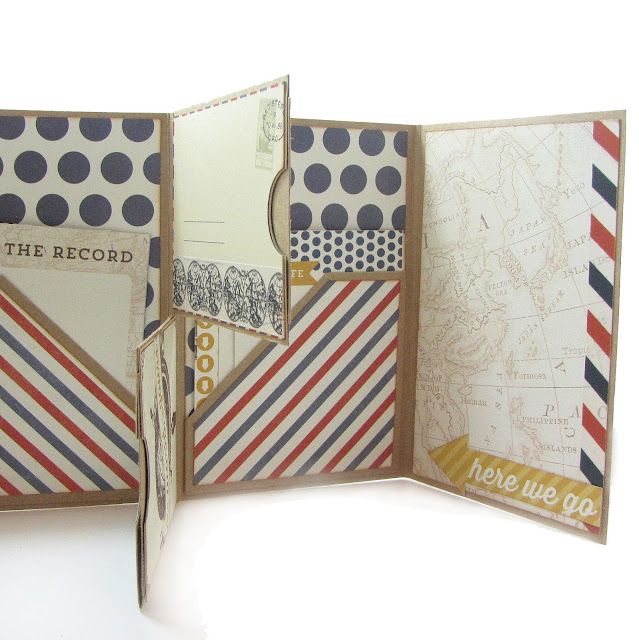
The mini measures 4" x 6" inches.  It has a couple of fold out pages & several areas to store photos and/or journaling.

In the center of the mini there are two pockets that holds tags measuring 3 3/4" x 2 1/2" inches.


The back fold out mimics the front & also consists of a pocket where I've tucked in a few more life cards from the collection.


The front folds out to reveal an inner pocket where I've tucked in a couple of life cards from the 'Explore' collection.

I've also used a bull dog clip to hold a small booklet & a tag.  The booklet measures 3 1/4" x 4 1/4" inches & can hold either photos our journaling.


While prowling Pinterest I came across a tutorial that inspired me to make this mini.  I altered it slightly from the original tutorial.  The tutorial is in on a French blog--but it does have English translations.  You can find the tutorial here.

Supplies: Paper - Authentique, Embellishments - Authentique, Flowers - Petaloo, Ribbon - Petaloo, Other - Charms, Bull Clip, Washi Tape

As always, thanks for stopping by!

Wednesday, January 4, 2017

A 'Wintery' Tri-fold Mini Album With Tutorial

Hello once again fellow scrappers & Happy New Year!  I hope everybody had a memorable, happy & safe New Year.  I know I spent it quietly in my PJ's along with the rest of my family snuggled up in bed while watching the festivities in Times Square on TV.  :-)

Let's start off the New Year with this project share conveniently made with Authentique's 'Wintery' collection.  The weather is cold outside & this collection conveys those feelings with images of mittens & snowflakes plus a color scheme of blue/grey with pops of red here and there.


I've decided to make another tri-fold mini album--this time complete with a tutorial.  I've made this sort of mini before & have gotten several requests asking how this mini is made.  Let's start off by saying that this was not my original idea.  I ran into this tutorial on a French blog about a year ago & that's where I got the idea from.  With my first tri-fold mini I included a link to the tutorial I used, but it was brought to my attention that the owner took down the tutorial.  So I decided to do my own take on a tutorial for this tri-fold mini.
The mini measures 9 1/4" x 3 1/4" inches & opens up accordion style.  It consists of several 3" x 3" inch squares that can be used to store photos, journaling, sentiments, embellishments etc...


The back of the mini has additional squares for more photos, plus I've included one pocket that holds a tag meant for journaling & one square that I've used to place a sticker element from the 'Wintery' collection.  Mini is held closed with ribbon.


This mini is up for sale in my Etsy shop 'The Kraft Nook'.  If interested you can visit my shop here.

Supplies: Paper - Authentique, Embellishments - Authentique, Flowers - Recollections, Other - Ribbon, Fabric Poinsettia, Mini Pine Cone Spray

I'm sure there's probably another tutorial out there for this type of mini album--but for now I've decided to create my own version.  Below you'll find the tutorial.  Enjoy & thanks for stopping by!