


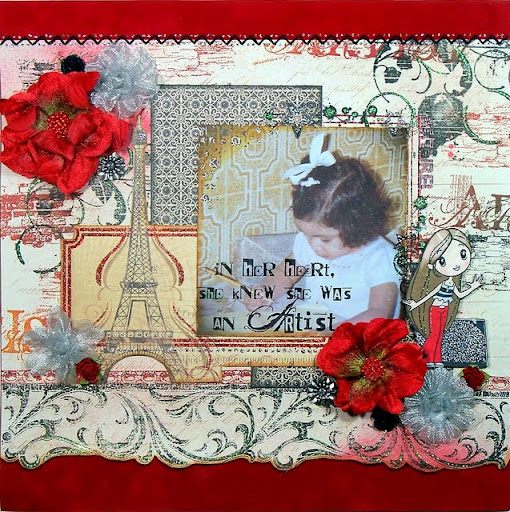
Good evening once again fellow scrappers & bloggers! Today's post is one based on yours truly. That's me at a very young age doing what I've always loved to do...draw! Gotta love the big ol' bow in my hair & the so very 70's wall paper! :-)
As usual, I did an overload of stamping on this page. The entire background is stamped including the large flourish scroll border you see at the bottom. This is a DT page for Stamp Enjoy. I've also used stamps by Tattered Angels & Stampers Anonymous. Some stitching, misting & Stickles to accentuate my stamped images added the final touches to the background.
The 'artist' sentiment that I stamped directly onto my photo is by Stampers Anonymous. Ensure that any stamping done directly on photos is with permanent inks such as StazOn or else your stamped image will smear.

The red velvet flowers were by Petaloo & the silver ones by Prima. Here you can see a close up of the stamped flourish border & how I dressed up the flourishes with a bit of Diamond Stickles. The flourish stamp is from a set called Architectural Trims by Tattered Angels.

This next screen shot shows a bit of the zig-zag stitching I did & a texture stamp by Stamp Enjoy titled Volutes et Ronds. I have to say that I'm in love with this stamp. I've used it in just about all my backgrounds because it adds just the right amount of grungy texture.
Tip: Dress up your stitching with a bit of Stickles. I added two drops of Silver Stickles in between each zig-zag stitch to give the stitching a different look.

Here's a close up of some heavy hole punch distressing that I did to the corner of my photo. Just take hole punches of different sizes & randomly punch away at a corner--then ink it up with some distress inks. I used Tea Dye distress ink on my photo. This technique I got from Irene Tan better known as Scrapperlicious.

This very cute little 'artist' stamp is by Stamp Enjoy titled Abreen Artiste. I colored her with Prismacolor markers & dressed her up with Stickles. I used a bit of light pink chalk to add the pink glow on her cheeks.

This final screen shot shows again the Volutes et Ronds stamp as well as the corner angle stamp by Stamp Enjoy titled Naturel. Once again, you can see in this screen shot how I used the Stickles to dress up my stamped images.
Thanks to all of you who take the time to stop by. I hope this page inspires some of you to create your own backgrounds with stamps!
