HOMEABOUT MERESUMETUTORIALSMY FAVES
Showing posts with label Tutorials. Show all posts

Friday, October 30, 2020

A 'Masquerade' Mini Album With Tutorial


Happy Halloween everyone!  For today's post, I've made a Halloween themed album with the fabulous 'Masquerade' collection by Authentique. The album measures 7" x 4 1/2" inches and has four 1 1/4" inch spines. The album is held closed with a glittered elastic ribbon. The cover is decorated with both fabric & mulberry paper flowers, a mini pinecone & ghost & bat embellishments.

Album is available for sale in my Etsy shop, The Midnight Kraft Desk.


The inside of the album consists of a pop up page, three waterfalls & three pocket pages.  The pop up page was made with a die by Karen Burniston. I only used the die to create the mechanism for the pop up element as it was the perfect size for this album. There are many tutorials available for these sort of pop up pages. Search on either YouTube or Pinterest for 'pop up cards' or 'twist pop up card'. I've found this tutorial primarily for making a pop up card--but they can be used in mini albums as an interactive page.


The waterfall photo mats measure 3 1/4" x 4 1/4" inches & are decorated with cut apart cards from the collection. The front of the photo mats can store pictures measuring up to 3" x 4" inches. The backside of each photo mat can store photos measuring up to 3" x 3 1/2" inches.


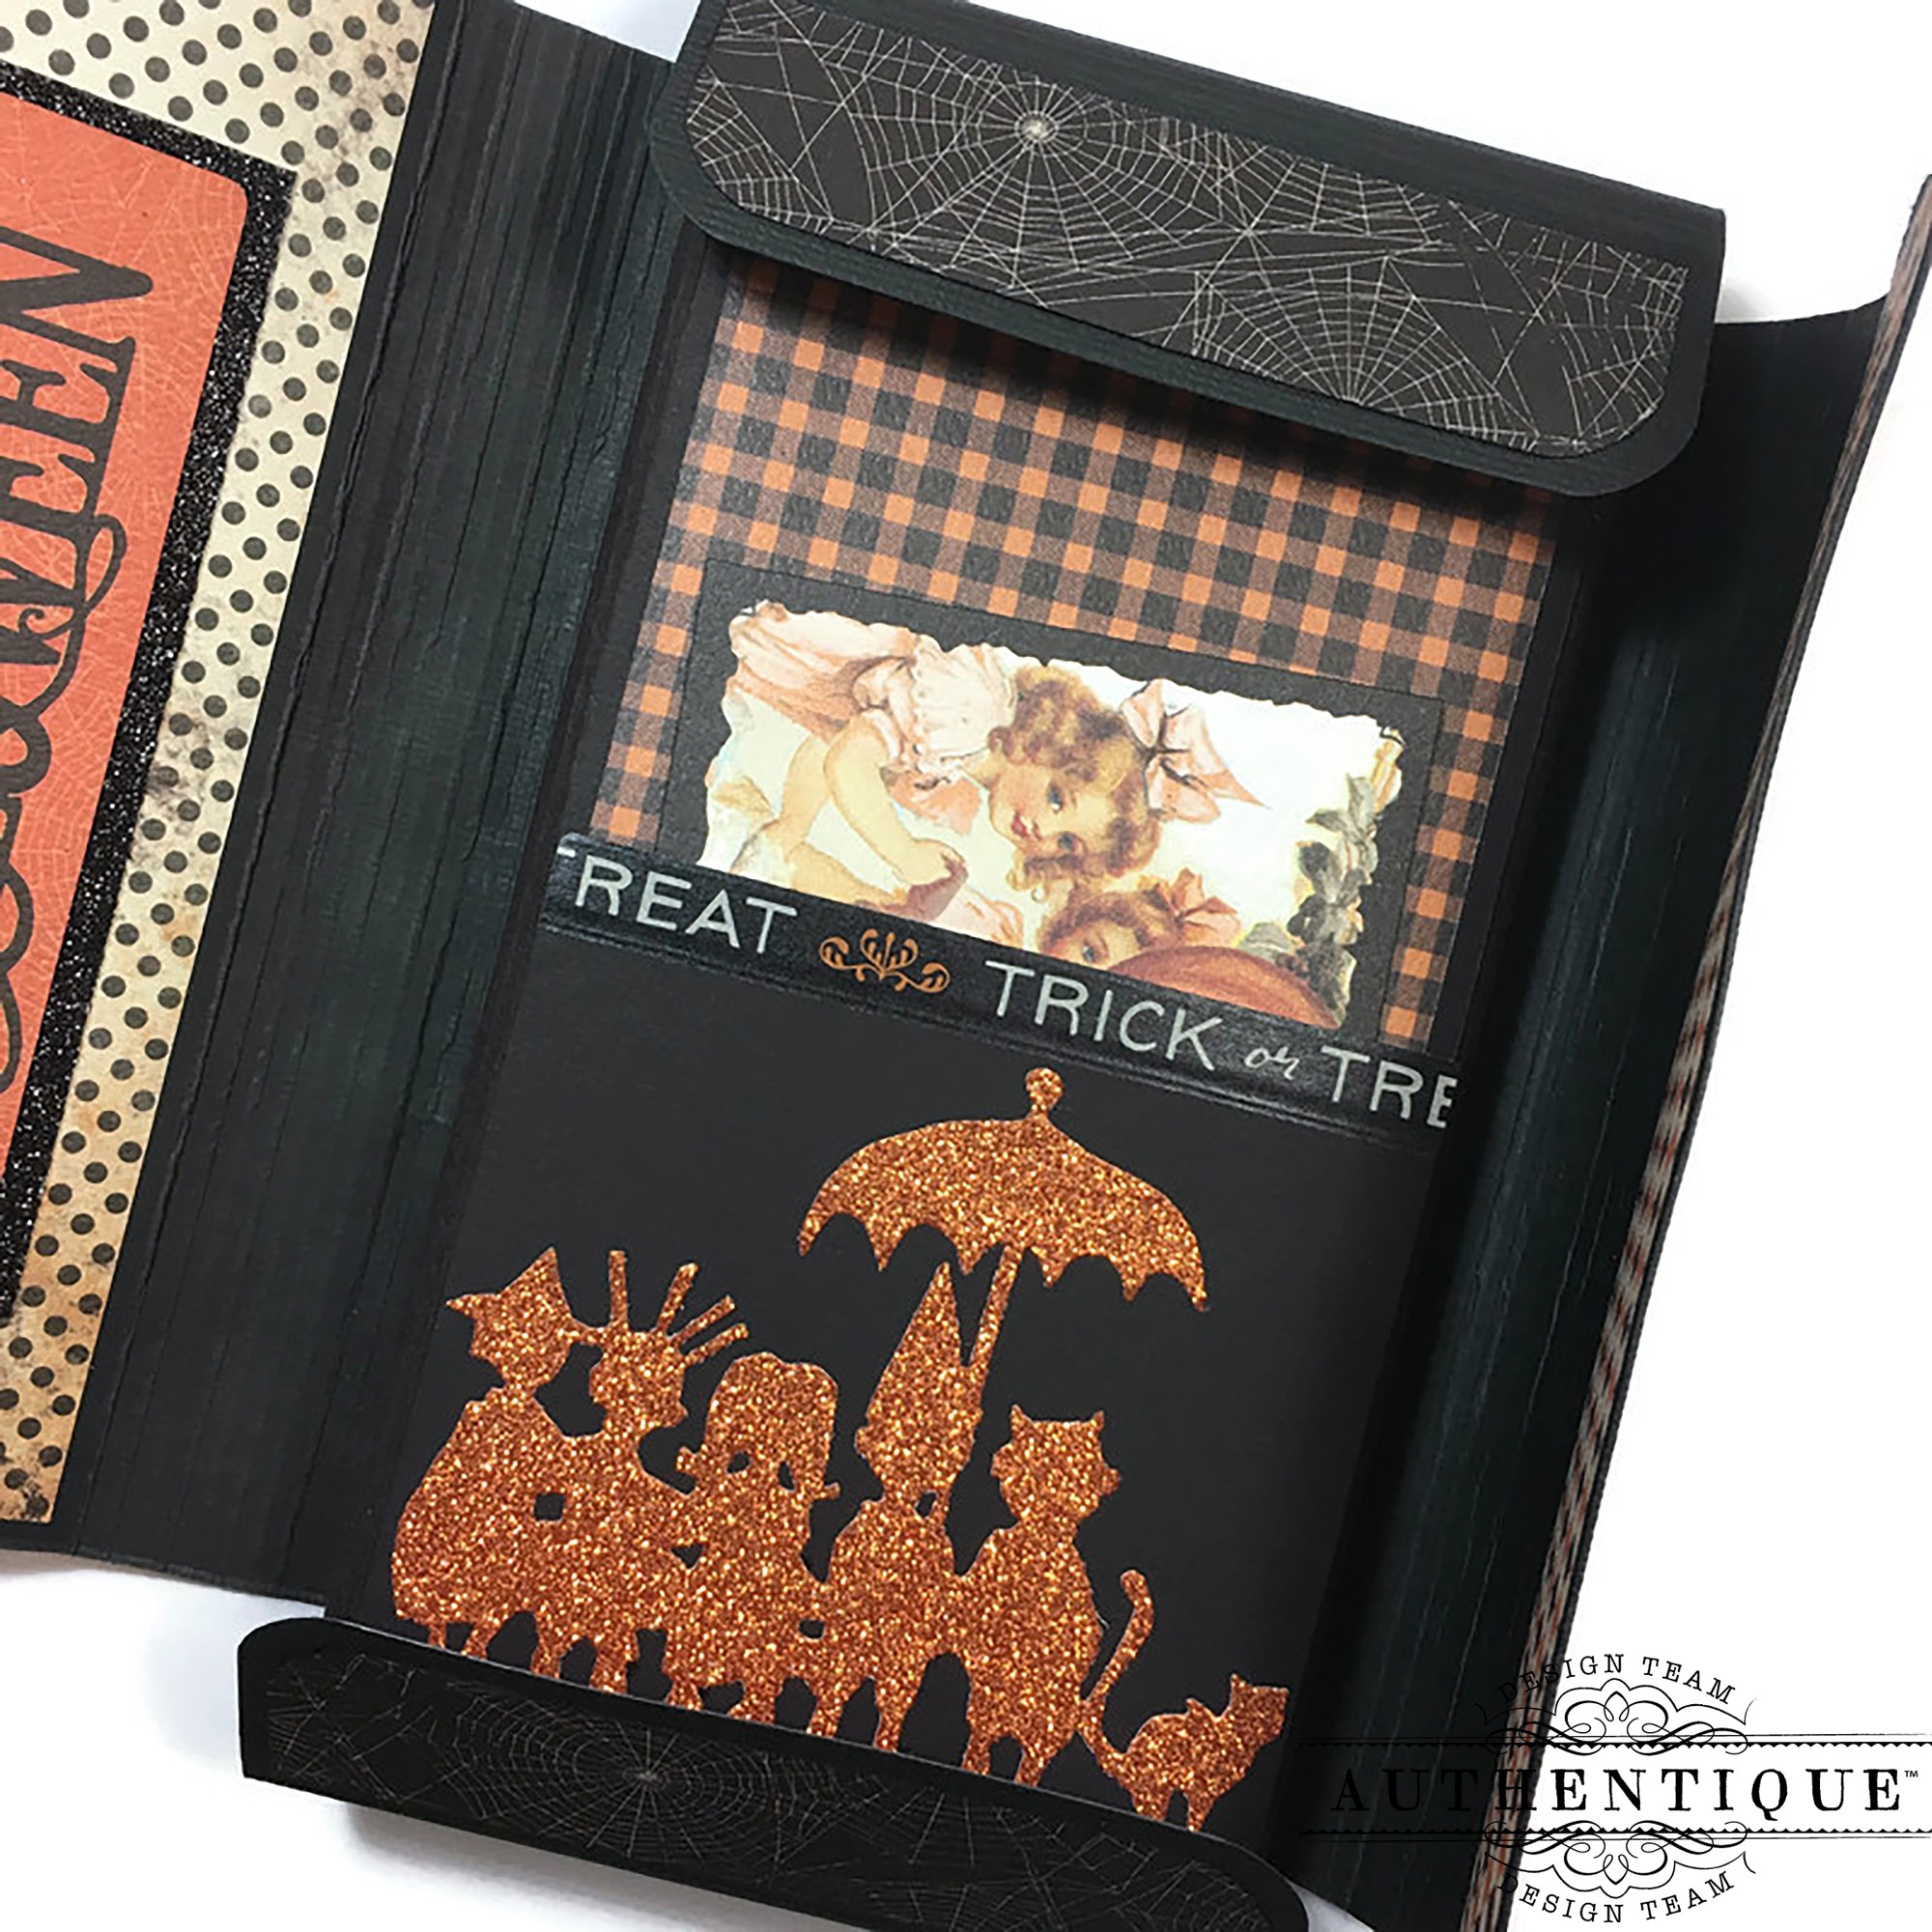
There are two different style of pocket pages in the album. Two pages are simple pocket pages that are decorated with a Halloween die cut image of Trick or Treaters. Inside all the pockets is one cut apart card from the collection.


The pop up page is held closed with a magnet & the waterfalls are kept closed by tucking the bottom pull page of the waterfall underneath the bottom cut apart card adhered to the first page of the waterfall.


Here is the 2nd style pocket page. This page has a simple pocket on the bottom but also has a 'slotted' pocket element on top where small embellishments & card stock stickers can be stored.

Supplies Used: Paper - Authentique, Dies: Sizzix Tim Holtz Stitched Slots Die, Sizzix Tim Holtz Trick Or Treat, Karen Burniston Twist Panel Pop Up Die, Other: Glitter Elastic Ribbon, Fabric Flowers, Mulberry Paper Flowers, Mini Pinecone, Bat Embellishment, Ghost embellishment 

Below is a video walk through of the album & also a video tutorial on how to make this album.

Enjoy & have a safe Halloween!


Photobucket

Wednesday, July 8, 2020

An 'All Star - Dance' Pop Up Star Mini Album With Tutorial


For today's post, I'm revisiting the 'Pop Up Star Mini Album' that I made a few months ago with the 'Purebred Pets' collection by Authentique--you can find my original post here.

This time, I've used the 'All Star - Dance' collection for this project. I felt the 'pop up' element for this album went along nicely with the dance theme of the paper collection. I was also able to provide a tutorial on making the pages for this album. You'll find the link to the tutorial at the end of this post.

This style of mini album is meant to be on display on a shelf, desk or table--but it can also be stored closed.

Mini album is available for sale in my Etsy shop, The Midnight Kraft Desk.


The album measures 7 1/2" x 6 3/4" inches when closed. Since it's a 'star' style album; it has five 'pop up' pages. 

The black clip seen in the picture above is what's used to keep the album open when on display.


I kept the decorating of the album along the same lines as what I did for the 'Purebred Pets' album. The one major change I did is that I created pocket pages in this album which I did not include in the 'Purebred Pets' album.


There are several places throughout the album for storing photos, journaling, small mementos & keepsakes & several other memorabilia.


I used blue paper clips decorated with lace & red tulle for keeping the flaps included in this album closed.


The binding of the album is done by adhering each page to the other with hinges & in turn, creating large pockets. There are four pockets--inside each pocket there's a large tag measuring 7" x 7" inches.  Each tag is also a pocket itself--in essence there's a pocket inside a pocket if that makes any sense! :-) What I'm saying makes a whole lot more sense in the video walkthrough provided at the end of this post.


This album is a bit difficult to photograph--which is why I created a video walkthrough. 


Supplies: Paper - Authentique, Other - Tulle, Washi Tape, Paper Clips

Below is a both a video walk through of the album & a video tutorial on how to make the pages.  Thanks for stopping by, stay safe & enjoy!


Photobucket

Sunday, March 29, 2020

A 'Dublin' Tri-Fold Shutter Mini Album With Tutorial


Hello my friends. I'm back today to present the tutorial for the tri-fold shutter mini album that I originally presented for Valentine's Day with the 'Love Notes' collection by Authentique.  You can find the original post here on the Authentique blog.

I hope you're all staying safe during this difficult time that we're all going through. Besides working from home & learning from home (for my son)--I've found that crafting has been a distraction for me & has taken my mind away from what's going on around the world right now.  I hope you all find this tutorial helpful & provides an outlet to something a bit more pleasant.

For this project, I've used the 'Dublin' collection by Authentique. This is my St. Patrick's Day project.  Yes, I'm a little late but better late than never as they say.

This album is also available for sale in my Etsy shop: The Midnight Kraft Desk.  Feel free to visit if interested.


As with the 'Love Notes' Tri-fold mini album--I've followed the same design & techniques with the 'Dublin' mini album.  The album measures 7" x 8 1/2" inches.  It has two 1/4" inch spines and is held closed with a sliding belly band.

The belly band is decorated with mulberry paper & fabric flowers. I also added a St. Patrick's themed sticker from my own stash.


This album is an overload of green! It has all sorts green shades--I love it.  :-) The primary pages are held closed with a belly band that tucks in behind the pages.  The belly band is decorated with a slider that has an image of what else...but a four leaf clover!


The album has two angled pockets on the inside of both covers.  Inside the pockets are tags.  Both tags measure 7 1/2" x 3 1/2" inches.


On the inside are two photo mats (one on each side) that can hold photos measuring up to 3" x 4 1/2" inches.

There are two additional photo mats on the back of each page.


In the center of the mini album there is a pocket. Inside the pocket are two tags. The larger tag measures 6 1/2" x 3 1/4" inches & the smaller one measures 3 1/4" x 4 1/4" inches.

These tags are used to keep the waterfall in place.


Finally, behind the tags is a small waterfall. The waterfall consists of five pages. Each page measures 4 1/4" x 3 1/4" inches & can hold photos measuring up to 3" x 4" inches.


Below you will find two videos. One is a walk through of the mini album & the second one is the tutorial for making the mini album.

Enjoy & stay safe my friends.


Photobucket

Thursday, October 31, 2019

A 'Twilight' Cascading Mini Album


Happy Halloween!  For today's post I've created another cascading mini album.  This one is a Halloween themed album made with the fabulously spooky yet charming 'Twilight' collection by Authentique.

I've done this type of project before & have also provided a tutorial on how I make these sort of albums.  I'll provide the link to my tutorial at the end of this post.  

Album is available for sale in my Etsy shop, The Midnight Kraft Desk. Feel free to visit my shop if interested!

My plan is to make both a Halloween & Christmas themed cascading mini album in order to show how this sort of album can be applied to any occasion.  All you need is a die that fits the intended design.  So here's my Halloween album, stay tuned for the Christmas one!

The album measures approximately 9 3/4" x 5 1/2" inches & has four 1/2" inch spines.  The base of the album is made from 110 lb black card stock.


For my Halloween border, I've used the Graveyard border Die by Tim Holtz.  Other than the different border die I've used--the rest of the album was put together following the same steps as seen in my video tutorial. 


The inside of the album consists of several pockets, swing pockets, belly bands, tags & I was even able to include one waterfall this time.  This provides for several places to store photos, journaling and any other memorabilia.


To decorate the album, I've used several elements from the collection, including card stock stickers & 3" x 4" inch cut aparts that I've matted on black card stock.


The album consists of several tags & booklets.  The largest tag measures 7 1/2" x 5" inches and the smallest tags measure 2 1/2" x 2 1/2" inches.


There are two 'swing' pockets in this album.  One on either side of the tallest page in the album.  These pockets measure 5 1/4" x 3" inches.  


On one side of the tallest center page, there's one waterfall.  These can hold up to nine photos measuring up to 3" x 4" inches.

I hope this album inspires some of you to try your own cascading mini album.  It's a versatile technique that can be applied for any theme.

Below are two videos.  One is a walkthrough of the mini album and the second is for my cascading mini album tutorial.

Enjoy!

Supplies: Paper - Authentique, Embellishments - Authentique, Die - Sizzix Tim Holtz,  Fabric Organza Star Flowers - The Midnight Kraft Desk, Other - Bakers Twine, Mini Glitter Spider, Mini Pine cone Spray


Photobucket

Friday, October 18, 2019

A 'Scholastic' One Page Mini Album With Tutorial


For my latest Authentique DT project, I have a simple & quick mini album that can store multiple photos, journaling & other memorabilia.  All it takes to create this album is just one piece of 12" x 12" inch card stock!  

Mini album is available for sale in my Etsy shop, The Midnight Kraft Desk.  Feel free to visit my shop if interested.

I've made this project before with the 'Explore' collection.  Click here to revisit my first project using this technique. This time around I've provided a tutorial on how to create the base for this album.  You'll find the link to the video tutorial at the end of this post.

For this project, I've used the fabulous 'back to school' themed collection 'Scholastic'.  The album measures approximately 4" x 6" inches when closed.


The red organza star shaped flower decorating the cover of the the album is from my own stash & can also be found for sale in my Etsy shop The Midnight Kraft Desk.  Visit my shop for more star shaped flowers in different colors & for additional embellishments.


The album has a couple of fold out pages & several areas to store photos and/or journaling.


In the center of the album there are two swing pockets with a tag in each pocket.  Each pocket measures 4" x 3" inches.


The front folds out to reveal an inner pocket where I've tucked in a couple of cut apart cards from the 'Scholastic' collection.


There's a cut apart in the front panel that swings open revealing a place to store a photo.


The back mirrors the front & also consists of a pocket where I've tucked in a few more cut apart cards from the collection.

I've decorated two blue paperclips with tulle & mesh ribbon and use these clips to hold a couple of the stickers from the collection in place & to keep the swing cut aparts closed.

While prowling Pinterest I came across a tutorial that inspired me to make this mini. I altered it & added my own preferences but this is where I got the idea for this type of album. The tutorial is in on a French blog--but it does have English translations. You can find the tutorial here.

Supplies: Paper - Authentique, Embellishments - Authentique, Flowers - Petaloo, The Midnight Kraft Desk, Other - Ribbon, Paper Clips, Washi Tape, Tulle

Below are two videos.  One is a walk through of the mini album, the second video is my version of the tutorial.  Thanks for stopping by & enjoy!


Photobucket

Friday, August 16, 2019

A 'Mister' Dimensional Pop Up Star Mini Album With Tutorial


For today's project, I have a slightly different twist on the traditional 'star' mini album.  I've seen this type of mini album countless times in both Pinterest & YouTube.  However, a dimensional or 'pop up' version of this type of mini isn't as common.  

I saw photos for this particular style on Pinterest but could never find a tutorial for it.  So I recreated it 'my way'.  I'm happy with the end result.  At least it 'looks' like the photos I've seen.  So as far as I'm concerned "mission accomplished"!  :-)

For this project, I've used the 'Mister' collection.  A masculine themed collection that I absolutely loved working with.  I'm surrounded by men in my house.  So these sort of collections always works for me.

Mini album is for sale in my Etsy shop--The Midnight Kraft Desk.


In addition to the dimensional photo mats, I've added pockets, belly bands & flaps to the pages of this album.  There's much room within this mini for storing photos, journaling and any other sort of memorabilia.

The photo mats are designed to store 3" x 4" inch photos and/or wallet sized photos (2 1/2" x 3 1/2" or 2" x 3" inches).


This mini album was a bit difficult to photograph but I was able to capture a decent photo from the top.  Here you can see from where this mini gets its name from.  When viewed from the top, one can see the 'star' design the album forms once open.

This mini album is meant to be put on display on a shelf, table, desk etc...


The photo mats are removable.  They can be removed from the base of the mini by gently sliding them out from their holding place.  The key here is the word 'gentle'.  The base of the mini is card stock after all.  So it can rip or tear if handled roughly.  However, the idea of this mini is that once the photos are added there really will not be a need to remove the photo mats anymore--but if needed, it can be done!


Though the mini album is meant to be put on display--it does fold closed for flat storage.  When closed this mini measures 6 1/2" x 4" inches.

Below you'll find two videos.  One showcases the mini & the other is a tutorial showing how the base of this mini is made.

Enjoy!


Photobucket