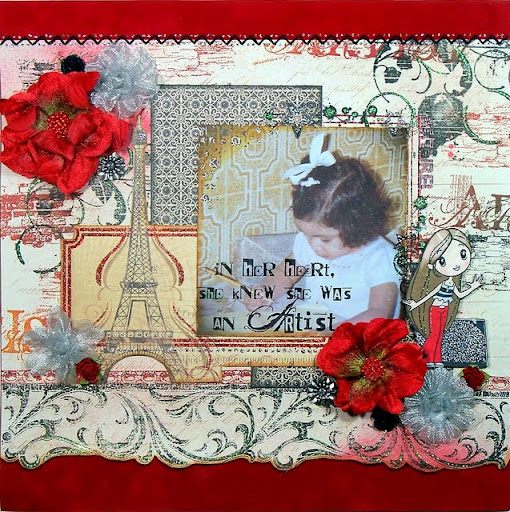
Good evening once again fellow scrappers & bloggers! Today's page is one I did for Stamp Enjoy. It's also a remake of an older page titled "Just the 2 of Us". I felt my original page was a bit too feminine--so I re-did it while keeping only certain elements but adding more of a 'grungy' masculine theme.
This is my husband & my little fur-pup Toby. These two are 'my boys'--the men in my life! This photo captures the bond & special friendship these two share. Yes, it's true that my husband isn't exactly a 'little boy' anymore. But the friendship they share is the typical 'boy & his beloved dog' that we've all heard about since the Little House & the Prairie days. As usual, Toby seems to be smiling in this picture. How he pulls that off is beyond me...but he somehow manages to smile in the majority of his pics!
As previously mentioned, I tried to keep this on the masculine side; therefore you'll notice a bit of 'grunge' in the style of this page. However, I did manage to include flowers in order to soften it just a bit. They are what I call 'man flowers'. :-)

Here's a close up of one of the two beaded flowers with burlap bottoms. The burlap portion of the flower I made by doing my 'burlap flower' tutorial found here. The beaded flower is an item you can find in my Etsy shop. I have several beaded flowers in a variety of colors. So if interested, please do feel free to stop by. These beaded flowers really do add a nice finishing touch to any project. The metal string circle around the beaded flower is an item I found at my local Michaels in the clearance section. I thought they'd be perfect for masculine themed pages.

A close up of the brick wall & my stamped little guy with his pup. The brick wall is a chippie by Dusty Attic. I used the 'brick texture' technique to give it that rustic brick look. I have a brief tutorial for this on my blog. If interested, you can check it out here.

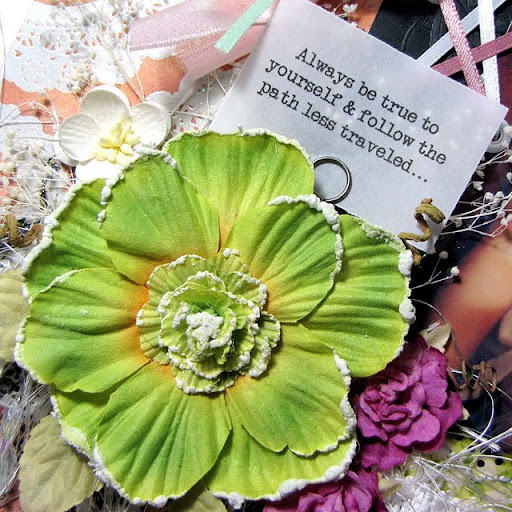
Here you can see my cluster of tags. I made the folded corner act as a makeshift pocket for my tags.

A close up of the flourish. The flourish was die cut with Tim Holtz's Elegant Flourish die on grunge board. I spread a thin layer of molding paste on the grungeboard & then heat embossed with Enamelz by Shimmerz. Enamelz is a thicker embossing powder than your regular embossing powder--so it adds a really nice effect when combined with other media.

Here's my background. It was first completely painted with an olive acrylic paint. Once dry then I randomly spread a bit of molding paste. Finally I sprinkled a bit of silver Enamelz (Silver Fox) & heat embossed it. This gave me a fabulous background. After looking at it for a bit I realized that this would also look really nice for a Christmas themed paged.

I used a piece of burlap from Canvas Corp to put behind my photo. I also again did a combination of zig-zag stitching & straight stitching. I first used this stitch in my 'Essential Cog' page & really liked the look of it.
I used a corrugated 'flute' cardboard by Canvas Corp for the background. I did a lot of embossing/painting on the corrugated cardboard. I also did a bit of stitching & went a little tag crazy in the upper left hand corner! :-)
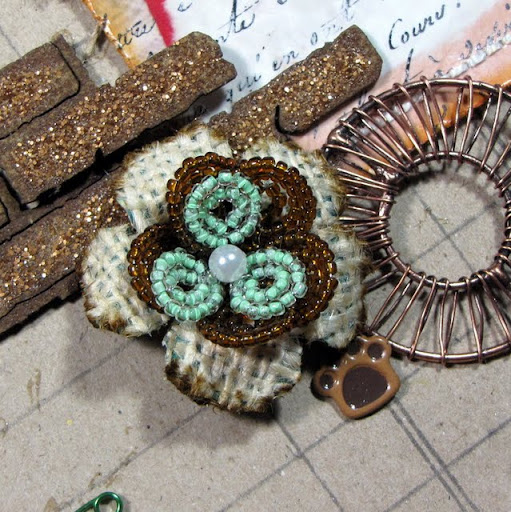
Here's a close up of one of the two beaded flowers with burlap bottoms. The burlap portion of the flower I made by doing my 'burlap flower' tutorial found here. The beaded flower is an item you can find in my Etsy shop. I have several beaded flowers in a variety of colors. So if interested, please do feel free to stop by. These beaded flowers really do add a nice finishing touch to any project. The metal string circle around the beaded flower is an item I found at my local Michaels in the clearance section. I thought they'd be perfect for masculine themed pages.

A close up of the brick wall & my stamped little guy with his pup. The brick wall is a chippie by Dusty Attic. I used the 'brick texture' technique to give it that rustic brick look. I have a brief tutorial for this on my blog. If interested, you can check it out here.

Here you can see my cluster of tags. I made the folded corner act as a makeshift pocket for my tags.

A close up of the flourish. The flourish was die cut with Tim Holtz's Elegant Flourish die on grunge board. I spread a thin layer of molding paste on the grungeboard & then heat embossed with Enamelz by Shimmerz. Enamelz is a thicker embossing powder than your regular embossing powder--so it adds a really nice effect when combined with other media.

Here's my background. It was first completely painted with an olive acrylic paint. Once dry then I randomly spread a bit of molding paste. Finally I sprinkled a bit of silver Enamelz (Silver Fox) & heat embossed it. This gave me a fabulous background. After looking at it for a bit I realized that this would also look really nice for a Christmas themed paged.

I used a piece of burlap from Canvas Corp to put behind my photo. I also again did a combination of zig-zag stitching & straight stitching. I first used this stitch in my 'Essential Cog' page & really liked the look of it.
Thanks to all of you who stop by for a visit! Enjoy the weekend...